
Drywall is a key component in almost every interior space, serving as the foundational surface for paint, wallpaper, tile, and more. If you’re planning a renovation or a new build, understanding what to expect during a professional drywall installation can help you prepare, avoid delays, and ensure a flawless finish.
Below, we answer the most common questions homeowners and property managers have about the process.
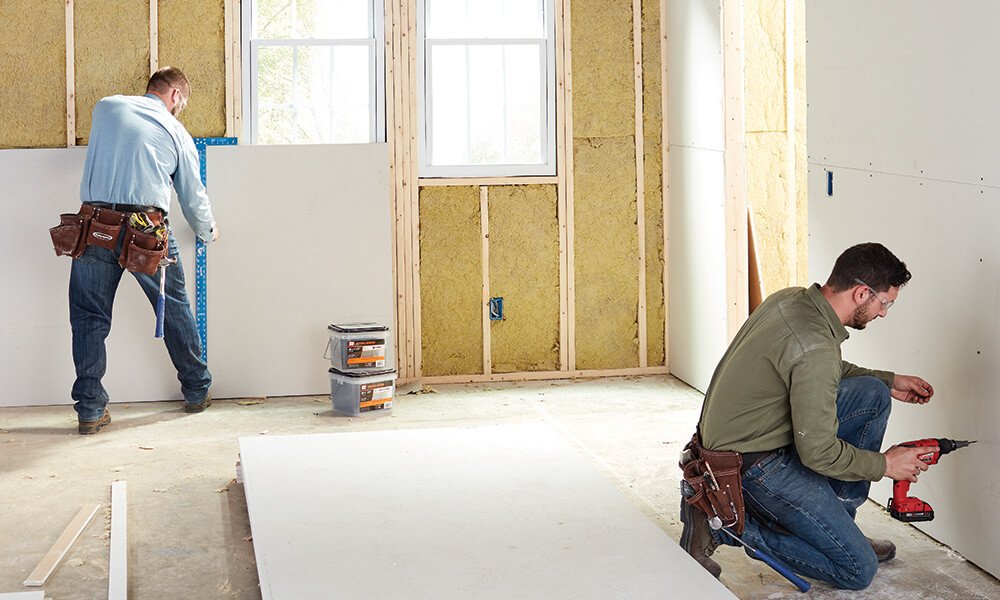
Q: What Exactly Does Drywall Installation Involve?
A: Professional drywall installation includes several detailed steps:
- Framing check and surface prep – Ensuring that studs or ceiling joists are level, plumb, and ready for board attachment.
- Hanging drywall sheets – Securing panels using screws or nails, typically with staggered seams to enhance strength.
- Taping and mudding – Covering joints and fasteners with drywall tape and applying joint compound for a smooth surface.
- Sanding and finishing – Creating an even, paint-ready surface by sanding dried compound and correcting imperfections.
- Final inspection – Ensuring all joints are seamless and walls are level before priming or painting.
Each stage is performed in sequence and may require drying time between steps.
Q: How Long Does the Process Take?
A: The time required depends on the size of the space, complexity of the architecture (vaulted ceilings, archways, etc.), and number of layers needed. For a standard residential room, drywall installation typically takes:
- 1–2 days for hanging
- 2–4 days for mudding and sanding (allowing for compound drying time)
Larger projects or commercial spaces may take a week or more.
Q: What Should I Do to Prepare My Space?
A: Before the installation crew arrives:
- Clear the room of furniture and decor
- Cover floors with protective sheeting
- Ensure access to electrical and plumbing rough-ins is available
- Turn off HVAC systems to prevent dust from circulating
Professional contractors will usually provide dust barriers and floor protection, but prepping your space speeds up the process and ensures better results.
Q: How Do Pros Handle Difficult Areas?
A: Professional installers are equipped to manage tricky spots like:
- Ceilings – Often require scaffolding or panel lifts
- Corners and niches – Finished with corner beads and precision taping
- Plumbing or electrical cut-outs – Measured and cut precisely for outlets, switches, or pipes
Attention to detail in these areas ensures a seamless appearance and prevents future cracking or uneven surfaces.
Q: What’s the Difference Between DIY and Professional Work?
A: While DIY drywall may seem cost-effective, it often leads to inconsistent results. Professionals bring:
- Precision tools like automatic tapers, sanders, and panel lifts
- Experienced crews that complete work faster and with fewer mistakes
- Quality control throughout each stage
- Surface readiness that ensures flawless painting or finishing afterward
For best results, many homeowners opt for a reputable service like BuildRex drywall installation, which offers industry-grade equipment, skilled technicians, and a satisfaction guarantee.
Q: Are There Different Levels of Drywall Finish?
A: Yes, drywall finishing is categorized into levels (0–5):
- Level 1–2: Basic finish for garages or storage
- Level 3–4: Suitable for most residential walls with paint or wallpaper
- Level 5: Premium finish with a skim coat for high-gloss or specialty paint
Discuss your design goals with your contractor to ensure the correct level of finish is applied.
Conclusion
Professional drywall installation is a multi-step process that requires experience, timing, and technical skill. From framing prep to the final sanding, each phase builds toward a clean, polished result. With expert service, clear communication, and a well-organized site, you can expect reliable, high-quality results that stand the test of time.